SDK Flutter for Android and iOS
An article about using SDK Flutter for integrating a payment form in Android and iOS mobile applications.
Overview
Introduction
Mobile SDK Flutter for Android and iOS (referred to as SDK Flutter further in this article) is a software development kit with open-source code that can be used to integrate Flutter mobile applications with the Ecommpay payment platform.
SDK Flutter was developed as a plugin within the Flutter framework. It provides the functionality for interaction of customers with the user interface and for interaction of a mobile application with the Ecommpay payment platform which allows sending and receiving necessary information during payment processing.
SDK Flutter can be embedded in mobile applications built using Flutter (version 3.3.0 or later) and developed for Android (version 5.0 or later) or iOS (version 15.6 or later). The SDK Flutter libraries and code examples are available on GitHub and pub.dev. To access, use the following URLs:
Capabilities
The following functional capabilities are supported by SDK Flutter:
- Processing different types of payments made with cards, Apple Pay, and Google Pay as well as other payment methods available for the merchant's project. Supported payment types include:
- One-time one-step purchases.
- One-time two-step purchases (an authorisation hold can be placed via the SDK and subsequent debiting of the authorised amount is carried out via Gate or Dashboard).
- COF purchases (they can be registered via the SDK and then managed via Gate or Dashboard).
Note: In case of card, Apple Pay, and Google Pay payments, the payment interface described in this article is used. With other payment methods, Payment Page is used during payment processing. - Performing payment card verification (it involves debiting a zero amount from the customer's card).
- Checking current payment information.
- Auxiliary procedures and additional capabilities to boost payment acceptance rates:.
- Submission of additional payment information.
- Payment retries.
- Collecting customer data.
- Additional capabilities to improve user experience:.
- Saving customer payment data.
- Payment interface language support.
- Sending email notifications with the list of purchased items to customers.
- Customising the appearance of the payment interface including the colour scheme settings.
Workflow
Generally, the following workflow is relevant when purchases are processed with the use of SDK Flutter.

- In the user interface of a mobile application, the customer initiates a purchase by clicking the payment button or in a different fashion set up on the merchant side.
- In the mobile application, a set of parameters for creating a payment session is generated. Then, with the help of SDK Flutter, this set is converted into a string for signing, and the string is sent to the server side of the merchant web service.
- On the server side of the merchant web service, the parameters can be checked and supplemented if necessary, and the signature to the final parameter set is generated, following which the prepared data is sent back to SDK Flutter.
- With the help of SDK Flutter, a payment session is initiated in the payment platform.
- On the payment platform side, the payment interface is prepared in accordance with the invocation parameters, and the data for opening the interface is passed to the customer's device.
- In the mobile application, the payment interface is displayed to the customer.
- The customer selects a payment method (if no method was selected when the payment session was initiated), specifies the necessary information, and confirms the purchase.
- SDK Flutter sends a purchase request to the payment platform.
- On the payment platform side, the payment is registered and all necessary technical actions are performed; these actions include sending the required data to the payment environment—to the providers and payment systems.
- The payment is processed in the payment environment. Then the payment result information is received in the payment platform.
- In the payment platform, the information about the payment result is processed and a callback is sent to the server side of the web service.
- The information about the purchase result is sent from the payment platform to SDK Flutter.
- The notification with the result information is displayed to the customer in the user interface.
Interface
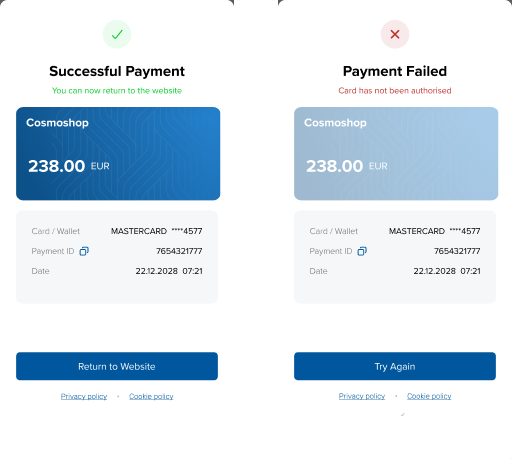
When card, Apple Pay, and Google Pay payments are processed, the customer interacts with the user interface designed by the Ecommpay specialists. This user interface can be customised: you can change its colour.


Setup
Integration steps
To integrate the web service with the Ecommpay payment platform by using SDK Flutter:
- Address the following organisational issues of interaction with Ecommpay:.
- If your company has not obtained a project identifier and a secret key for interacting with Ecommpay, submit the application for connecting to the Ecommpay payment platform.
- If your company has obtained a project identifier and a secret key for interacting with Ecommpay, inform the technical support specialists about the company's intention to integrate by using SDK Flutter and coordinate the procedure of testing and launching the functionality.
- Complete the following preliminary technical steps:
- Download and install SDK Flutter.
- Ensure the collection of data necessary for the payment interface invocation. The minimum data set needed in order to invoke the payment interface consists of the project, payment, and customer identifiers as well as of the payment amount and currency.
- Ensure signature generation for the data on the server side of the mobile application.
- Ensure the receipt of and the response to the notifications from SDK Flutter as well as the receipt of and the response to the callbacks from the payment platform on the web service side.
- With the technical support specialists, coordinate the timeline and the main steps of integrating, testing (including testing available payment methods), and launching the solution.
- For testing, use the test project identifier and the details of test cards.
- For switching to the production mode, change the value of the test project identifier to the value of the production project identifier received from Ecommpay.
If you have any questions about working with SDK Flutter, contact the Ecommpay technical support specialists (support@ecommpay.com).
Installation
To install SDK Flutter using the tools of the Flutter framework, follow these steps:
- Add the name of the plugin to the
pubspec.yamlfile of the project in use by issuing the following command.$ flutter pub add ecommpay_flutter_pluginAs a result, the
pubspec.yamlfile should contain the line with the name of the added plugin and its version.dependencies: ecommpay_flutter_plugin: ^1.0.4 - Open the
lib/main.dartfile and import the functionalities contained in the packageimport 'package:ecommpay_flutter_plugin/ecmpplugin.dart'; import 'package:ecommpay_flutter_plugin/ecmpplugin_method_channel.dart'; import 'package:ecommpay_flutter_plugin/ecmpplugin_platform_interface.dart'; import 'package:ecommpay_flutter_plugin/models/ecmp_additional_field.dart'; import 'package:ecommpay_flutter_plugin/models/ecmp_additional_field.g.dart'; import 'package:ecommpay_flutter_plugin/models/ecmp_payment.dart'; import 'package:ecommpay_flutter_plugin/models/ecmp_payment.g.dart'; import 'package:ecommpay_flutter_plugin/models/ecmp_payment_info.dart'; import 'package:ecommpay_flutter_plugin/models/ecmp_payment_info.g.dart'; import 'package:ecommpay_flutter_plugin/models/ecmp_payment_options.dart'; import 'package:ecommpay_flutter_plugin/models/ecmp_payment_options.g.dart'; import 'package:ecommpay_flutter_plugin/models/ecmp_plugin_result.dart'; import 'package:ecommpay_flutter_plugin/models/ecmp_plugin_result.g.dart'; import 'package:ecommpay_flutter_plugin/models/ecmp_recipient_info.dart'; import 'package:ecommpay_flutter_plugin/models/ecmp_recipient_info.g.dart'; import 'package:ecommpay_flutter_plugin/models/ecmp_recurrent_data.dart'; import 'package:ecommpay_flutter_plugin/models/ecmp_recurrent_data.g.dart';
You can also install SDK Flutter differently as described in the Flutter documentation (learn more).
Signature generation
Make sure that the data is signed on the server side of the web service with the use of the secret key received from Ecommpay. To work with the signature, you can use ready-to-use components, such as language-specific SDKs for web services (details), or your own in-house solutions. The procedure of working with the signature is described in Signature generation and verification.
Testing
If necessary, the payment interface can be invoked in test mode in order to get information about errors if there were any when payment parameters were specified or to test processing payments with a certain payment result. When creating the request to open the payment interface, in the EcmpPaymentOptions object specify the following values for the mockModeType parameter:
EcmpMockModeType.success—if you need to receive aSuccesspayment result.EcmpMockModeType.decline—if you need to receive aDeclinepayment result.
You can also test payment processing in the test environment of the Ecommpay payment platform. In this case, you should get access to the Ecommpay test environment (you can do it via an application on the company's main site and use the identifier and the secret key of the test project).
If you need to switch to the production mode, pass EcmpMockModeType.disabled as a value for the mockModeType parameter and use the production identifier and secret key.
Use
Payment interface invocation
SDK Flutter supports such actions as performing one-time purchases and placing authorisation holds as part of executing two-step purchases, registering COF purchases and performing payment card verification. To initiate these actions, you need a certain parameter set. The required minimum of parameters is passed in the EcmpPaymentInfo object while other parameters can be passed in the EcmpPaymentOptions object, requested from the customer, or received from the payment platform.
To invoke the payment interface:
- Create the
EcmpPaymentInfoobject containing the following required parameters.projectId(integer)—a project identifier assigned by EcommpaypaymentId(string)—a payment identifier unique within the projectpaymentCurrency(string)—the payment currency code in the ISO 4217 alpha-3 formatpaymentAmount(integer)—the payment amount in the smallest currency unitcustomerId(string)—a customer's identifier within the projectsignature(string)—a request signature generated after all required parameters have been specified
final paymentInfo = EcmpPaymentInfo(
            projectId: 77655,
            paymentId: "payment_322",
            paymentAmount: 100,
            paymentCurrency: "USD",
            customerId: "customer007"
          );
You can also add any other parameters listed in the separate table.
- Receive the string for signing the parameters.
final paramsForSignature = await ecmpPlugin.getParamsForSignature(paymentInfo); debugPrint(paramsForSignature); - Send this string to the server side of the application.
- On the server side of the application, sign the final set of parameters and send it to the client side.
- Add the signature to the
EcmpPaymentInfoobject.paymentInfo.signature = "CALCULATED_SIGNATURE_FROM_BACKEND"; - Create the
EcmpPaymentOptionsobject that contains the required parameteractionType(string) with the value specifying the target operation type:sale,auth, orverify. For card payments, specify at least one of the following fields:emailorphonein theadditionalFieldslist.If necessary, you can also specify additional information about the payment or the list of custom fields that will be displayed to the customer for collecting additional information (in the
additionalFieldslist), including prepopulated fields. For example, for 3‑D Secure it is recommended that you pass the customer's billing address information (country code, postal code, city, and street address). Parameters that can be specified in theEcmpPaymentOptionsobject are listed in the following table.Note: According to Visa, rigorous use of these parameters can significantly increase payment acceptance rates (up to 6 %) and drastically decrease the number of operations flagged as fraudulent after they have been processed (up to 65 %).The following example contains the required
actionTypeparameter and theemailparameter required for card payments as well as several additional parameters passed in theadditionalFieldslist to collect customer information. These additional fields include the parameters that are required for 3‑D Secure.final paymentOptions = EcmpPaymentOptions( actionType: EcmpActionType.sale, paymentInfo: paymentInfo, isDarkTheme: false, //if need use real service- set EcmpMockModeType.disabled mockModeType: EcmpMockModeType.success, //set display mode if need screenDisplayModes: [EcmpScreenDisplayMode.hideDeclineFinalScreen], //set additional fields if need additionalFields: [ EcmpAdditionalField(type: "email", value: "mail@mail.com"), EcmpAdditionalField(type: "first_name", value: "firstName"), ], //set recipient info if need recipientInfo: EcmpRecipientInfo(), //set recurrent info if need recurrentData: EcmpRecurrentData(), ); - Create the
EcmpPluginobject.final ecmpPlugin = EcmpPlugin();
- Send the request to invoke the payment interface and receive result information.
final response = await ecmpPlugin.sdkRun(paymentOptions);
The following is the example of the code that can be used to invoke the payment interface.
final ecmpPlugin = EcmpPlugin();
//create payment info
final paymentInfo = EcmpPaymentInfo(
projectId: 12312,
paymentId: "paymentId",
paymentAmount: 100,
paymentCurrency: "USD",
customerId: "customer007"
);
//get params for signature
final paramsForSignature =
await ecmpPlugin.getParamsForSignature(paymentInfo);
debugPrint(paramsForSignature);
//calculate and set signature and set it into payment info
paymentInfo.signature = "signature";
final paymentOptions = EcmpPaymentOptions(
  actionType: EcmpActionType.sale,
  paymentInfo: paymentInfo,
  isDarkTheme: false,
  //if need use real service- set EcmpMockModeType.disabled
  mockModeType: EcmpMockModeType.success,
  //set display mode if need
  screenDisplayModes: [EcmpScreenDisplayMode.hideDeclineFinalScreen],
  //set additional fields if need
  additionalFields: [
    EcmpAdditionalField(type: "email", value: "mail@mail.com"),
    EcmpAdditionalField(type: "first_name", value: "firstName"),
  ],
  //set recipient info if need
  recipientInfo: EcmpRecipientInfo(),
  //set recurrent info if need
  recurrentData: EcmpRecurrentData(),
);
try {
final response = await ecmpPlugin.sdkRun(paymentOptions);
debugPrint(response.toString());
} on PlatformException {
debugPrint("PlatformException");
}Payment processing
SDK Flutter allows processing one-step and two-step purchases (with the placing of authorisation hold via the SDK and subsequent debiting). To process a one-step purchase, pass sale in the actionType parameter in the request to invoke the payment interface. To process a two-step purchase:
- Send the request to invoke the payment interface with
authspecified as a value for theactionTypeparameter in theEcmpPaymentOptionsobject:actionType: EcmpActionType.auth
- When needed, initiate debiting of the authorised amount via Dashboard (details) or Gate (by sending the request to the /v2/payment/card/capture endpoint).
Payment card verification
Payment instrument verification can be used when you need to validate a card without withdrawing funds instantly (for example, before performing a payout) or when you need to save card details for subsequent use.
To perform verification, send the request to invoke the payment interface with verify specified as a value for the actionType parameter in the EcmpPaymentOptions object:
actionType: EcmpActionType.verify
Payment status information
To receive payment result notifications, use the EcmpPluginResult object.
import 'package:ecommpay_flutter_plugin/models/ecmp_payment.dart';
import 'package:json_annotation/json_annotation.dart';

part 'ecmp_plugin_result.g.dart';

@JsonSerializable()
class EcmpPluginResult {
  final int resultCode;
  final EcmpPayment? payment;
  final String? errorCode;
  final String? errorMessage;

  EcmpPluginResult(
      this.resultCode, this.payment, this.errorCode, this.errorMessage);

  Map<String, dynamic> toJson() => _$EcmpPluginResultToJson(this);

  factory EcmpPluginResult.fromJson(Map<String, dynamic> data) =>
      _$EcmpPluginResultFromJson(data);
}
Additional capabilities
Submitting additional payment information
Generally, for processing a payment, it is enough to send a set of parameters that are mandatory for its initiation. However, in some cases, a payment system or a provider can require additional data necessary for processing a particular payment. This can be due to region-specific requirements, the need for an additional anti-fraud check, or other factors.
The final set of required parameters can vary depending on a specific provider or a payment system. The list of parameters relevant for a particular payment is displayed to the customer on the payment form. The customer fills in the required data, confirms the payment, and receives the payment result information.
For more information about using the capability, see this article.
Collecting customer data
In some cases, alongside the mandatory parameters, it can be relevant to require the additional ones (such as phone numbers and email addresses) from the customers. To have this capability set up, the merchant should decide which data has to be mandatory to be specified by the customers and communicate data collection preferences to the technical support specialists. For more information about using the capability, see this article.
Payment interface language support
By default, the payment interface is localised according to either the language of the customer's device—if this language is supported for the project in use—or a language set as default for other cases (as a general rule, it is English). Along with that, if relevant, you can localise the payment interface for particular sessions. For this, every request for invoking the payment interface must contain a corresponding language code in the languageCode parameter of the EcmpPaymentInfo object.
The following languages are supported for the SDK Flutter interface and can be promptly set up in the projects of the payment platform.
| Language | Language code |
|---|---|
| English | en |
| Estonian | et |
| French | fr |
| German | de |
| Italian | it |
| Latvian | lv |
| Lithuanian | lt |
| Portuguese | pt |
| Spanish | es |
| Ukrainian | uk |
Saving payment data
SDK Flutter allows saving payment data of the customer for subsequent processing of payments without the need for the said customer to re-enter such data. This capability is set up individually for each project. The merchant has to let the technical support know which of the two options is preferable: always save payment data or ask the customer to select the option.
As a result of saving payment data, a separate identifier is generated for each payment instrument. This identifier is associated with the identifier of a certain customer (customerId). To display saved payment data to the customer, pass false in the hideSavedWallets parameter of the EcmpPaymentInfo object.
For more information about using the capability, see this article.
Additional parameters for invocation requests
Parameters of the EcmpPaymentInfo object
When working with SDK Flutter, you can use the following additional parameters in the EcmpPaymentInfo object.
| Parameter | Description |
|---|---|
|
|
Description of the payment. A string that contains between 1 and 255 characters. Example: |
|
|
Data to be included in the notification with the list of the purchased items, passed as a JSON object encoded using the Base64 scheme. Example: |
|
|
Token associated with certain payment data. A string that contains between 1 and 255 characters. Example: |
|
|
Parameter that allows you to enable hiding or displaying previously saved payment instruments. Possible values:
|
|
|
The identifier of the preselected payment method according to the table. Example: |
|
|
Payment interface language code in the ISO 639-1 alpha-2 format. Must match one of the languages supported for the given project. Example: |
|
|
Code of the customer's country in the ISO 3166-1 alpha-2 format. Example: |
Parameters of the EcmpPaymentOptions object
You can use the following additional parameters in the EcmpPaymentOptions object.
| Parameter | Description | |
|---|---|---|
|
|
The Google Pay identifier of the merchant. | 1 |
|
|
The Google Pay name of the merchant. | 2 |
|
|
Parameter that indicates a test payment. Passed when processing Google Pay payments. Possible values:
|
3 |
|
|
The Apple Pay identifier of the merchant. | 4 |
|
|
The description of the merchant in the Apple Pay service. | 5 |
|
|
Code of the customer's country in the ISO 3166-1 alpha-2 format. Passed when Apple Pay payments are processed. Example: |
6 |
|
|
Parameter that indicates the use of the payment interface's dark mode. Possible values:
|
7 |
|
|
The colour of the payment interface's main elements in hexadecimal format. Example: |
8 |
|
|
Parameter indicating that the payment result does not need to be shown in the payment interface. Possible values:
|
10 |
|
|
Additional fields that contain information about the customer. Contains the list of parameters and can include their values. Example:
|
11 |
|
|
Indicator of a COF purchase type. Possible values:
|
12 |
|
|
Object with information about the recipient of the payment. | 13 |
|
|
Card number. Example: |
13-113 |
|
|
First and last name (as specified on the card). Example: |
13-213 |
|
|
Number of the wallet. Example: |
13-313 |
|
|
First and last name of the recipient. Example: |
13-413 |
|
|
Code of the recipient's country in the ISO 3166-1 alpha-2 format. Example: |
13-513 |
|
|
Recipient's address. Example: |
13-613 |
|
|
Recipient's city of residence. Example: |
13-713 |
|
|
Recipient's state. Example: |
13-813 |
|
|
Object that contains information about a COF purchase that is being registered | 14 |
|
|
Indicator that specifies whether a COF purchase should be registered. Possible values:
|
14-114 |
|
|
Type of the COF purchase to register. Possible values:
|
14-214 |
|
|
Calendar day on which the specified duration period of the COF purchase will end (the value should be provided as an integer from 1 to 31, without a leading zero, in accordance with the Gregorian calendar). |
14-314 |
|
|
Month in which the specified duration period of the COF purchase will end (the value should be provided as an integer from 1 to 12, without a leading zero, in accordance with the Gregorian calendar). |
14-414 |
|
|
Year in which the specified duration period of the COF purchase will end (in the YYYY format, in accordance with the Gregorian calendar). |
14-514 |
|
|
Frequency of debits (for a regular COF purchase). Possible values:
|
14-614 |
|
|
Multiplier to increase debiting frequency (i.e. the interval of performing regular COF purchases). This parameter is used in conjunction with the Possible values: from |
14-714 |
|
|
Time of performing subsequent debits (for a regular purchase) in hh:mm:ss format. The parameter is used if the period parameter is specified in the request. |
14-814 |
|
|
Date on which the first debit operation is performed (for a COF regular purchase). This parameter is used in conjunction with the scheduled_payment_id parameter and should be specified in the DD-MM-YYYY format. |
14-914 |
|
|
Identifier assigned to the payment within which scheduled debits are performed (for automatic debiting), it must differ from the identifier of the payment made to register a COF purchase and must be unique within the project. Parameter must be passed together with the |
14-1014 |
|
|
The amount to debit in the smallest currency unit. | 14-1114 |
- For standard card payments—the corresponding parameter value (day, month, year) is determined based on the expiry date of the specified payment card.
- For other available methods—the corresponding parameter value is determined as follows:
- Calendar day—the last calendar day of the relevant month (as specified in the
expiry_monthparameter or corresponding to the COF purchase registration date). - Month—the month in which the COF purchase was registered.
- Year—the year that is 10 years after the year in which the COF purchase was registered.
- Calendar day—the last calendar day of the relevant month (as specified in the
Accordingly, if only the year is specified, for standard card payments the day and month are taken from the expiry date of the relevant card and combined with the specified year. For an alternative payment method, the expiry date is set to the last calendar day of the month in which the COF purchase was registered and the specified year.